How to Create a Power App: A Step-by-Step Guide
Suprabhat Sen | October 9, 2024 , 9 min read
Table Of Content
You need a business app tailored to your organization’s needs. But you don’t have the expertise for hardcore programming. You can simply build it with Power Apps—a tool developed by Microsoft in 2016 to create customized apps with little or no coding experience.
About 86% of Fortune 500 companies already use Power Apps
This guide will show you how to build a Power App. We’ll keep it simple, breaking things down so you can follow easily and not feel stressed. So, let’s get started!
4 Steps To Create A Stunning Power App
Building an app usually starts with spotting a business problem and coming up with a way the app can fix it. To build your Power App successfully, there’s usually a plan in place that defines each step of the execution—from designing to deploying.
So, before you start building your Power App, follow these steps to make sure you’re on the right track:
STEP 1. Plan
The planning stage is very important when it comes to Power Apps development. Why?
It gives you direction. To plan effectively on how to create a Power App, begin by figuring out the problem you want to solve (the use case) and understanding who your users are. This sets the stage for the features your app will contain.
You also need to set your goals and have a clear picture of the business process. All these are done in the planning stage. Get it right and everything else would fall in place.
STEP 2. Design
The designing phase of Power Apps development should be guided by what you planned in the previous step. There are two main parts to the design: Conceptual and Architectural. We will break it down.
Conceptual Design is the overall plan or blueprint of your app. It outlines what your app will do and how it will look.
For example, if the app will help a coffee shop take customer orders and handle payments, then the key features will include order taking, payment processing, and maybe Inventory tracking to automatically update inventory levels as orders are processed.
The Architectural Design focuses on how you’ll build the app using Power Apps.It explains how you’ll automate your business processes within the app.
Still using our coffee shop as an example, it will contain tables to store customer orders, keep track of inventory levels, and log payment transactions.
STEP 3. Build
This is the fun part, where you build the Power App based on what you planned and designed. You can use either canvas apps or model-driven apps.
Canvas Apps
i. Set up the data source:
- Set entities, tables, or lists.
ii. Create a new app:
- Use a sample app (under all templates when you log in to Power Apps).
- Use a template (Power Apps Portal, run default templates).
- Use Common Data Service in:
- SharePoint
- Teams
- Excel
iii. Add connectors
iv. Create screens:
- Home screen
- List view
- View form
- Edit form
v. Create Power Automate Flows.
We will go into detail on how to create a Power App by building an example app together later in this guide.
STEP 4. Test
Your app is built now, but you need to test it to ensure it works as it should. There are different ways to test it.
Examples include unit tests, end-to-end tests, and user acceptance tests (UAT). Depending on your app, you might also use tools like Power Apps Test Studio, Azure Monitor (for performance testing), EasyRepro (for Dynamics 365 and Power Apps model-driven apps), and Solution Checker.
The Solution Checker helps you see if your solution is healthy and provides recommended fixes.
STEP 5. Deploy & Refine
Once you’ve tested your app and everything works well, it becomes ready for users. Begin by sharing or publishing your app so people can start using it. You can do this in several ways. For example, with QR codes for potential users to scan and download the app.
Also Read: 17 Best Practices for Developing Power Apps
Wanna build Power Apps Like a Pro!
Get your FREE checklist to craft user-friendly, responsive, and impactful apps now.
Building Your First Power App: A Detailed Look
This section is a hands-on experience on creating your first Power App, step by step. We’ll create a Power App using some data with PowerAPP. We will also keep things simple for now without doing a lot of customizations. Let’s get started.
- We will start by creating a data source and include some sample data.
- Next, we will visit make.powerapps.com, log in, and connect to our data source.
- Make Power Apps by choosing the “Create from data” option to create the Power App.
- Save the App
1. Using Google Sheet as a Data Source for PowerApps
Create a Google Sheet list called PowerAppDemo with five columns. Add one row of data to use as a sample. Starting with sample data makes it easier to build and customise the app.

2. Creating a Data Connection in PowerApps
Open your browser then head to https://make.powerapps.com and you’ll see home page. On the left, click on create.

You’ll see a create your app window with many features and methods to create your app. Click Dataverse to make a connection.

Click + New Connection to add a new one.

From the list of available connections, choose Google Sheet.

After choosing Google Sheet, Click create then, you will be asked for your login details to set up the connection. Then, go to the google sheet connection and choose a dataset.

Choose a table which is sheet1 and on the right bottom, click on CONNECT.

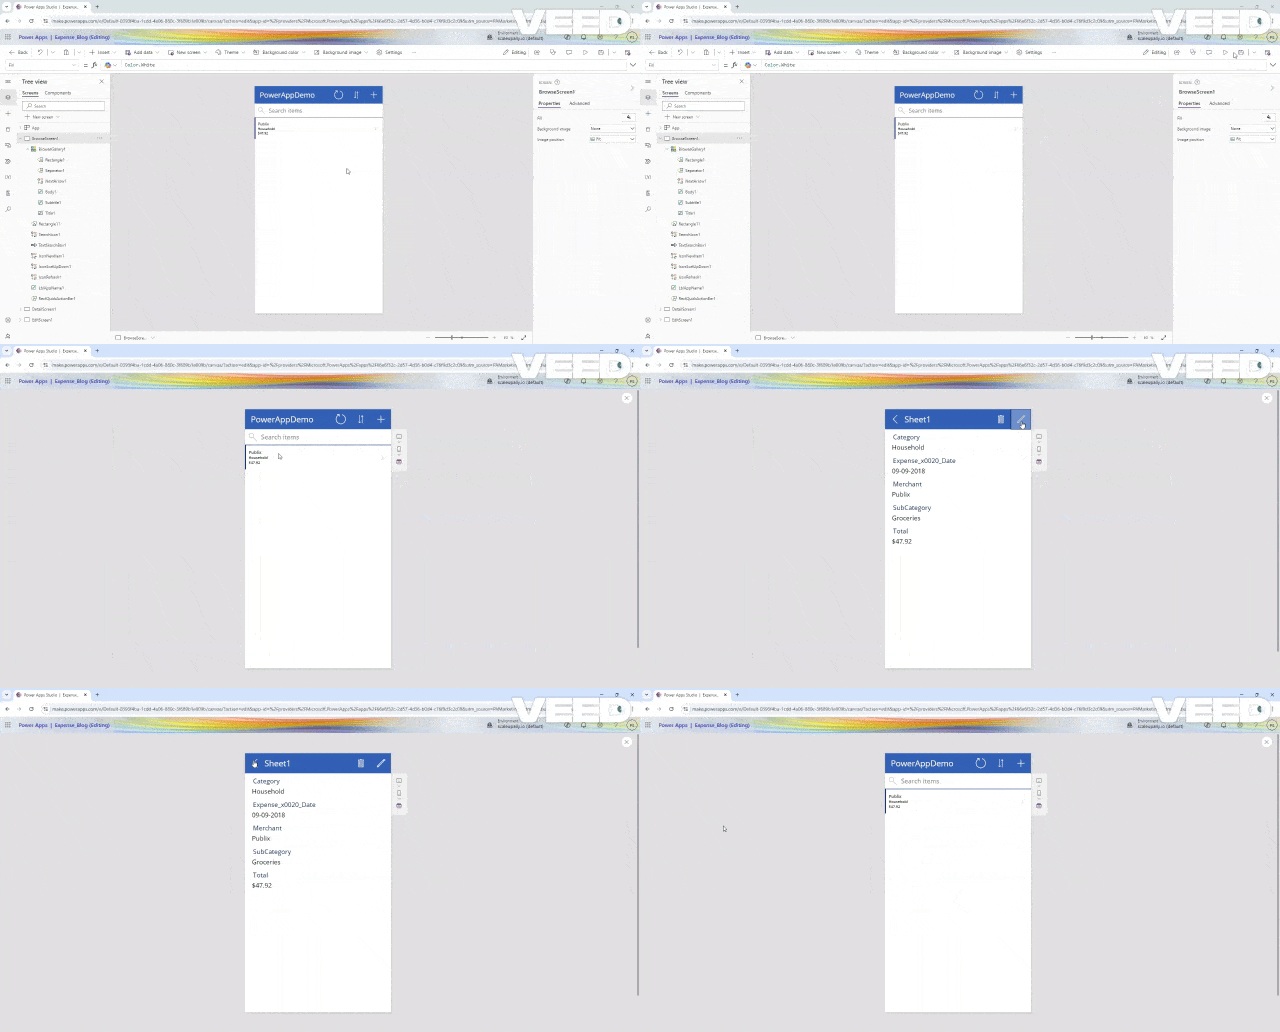
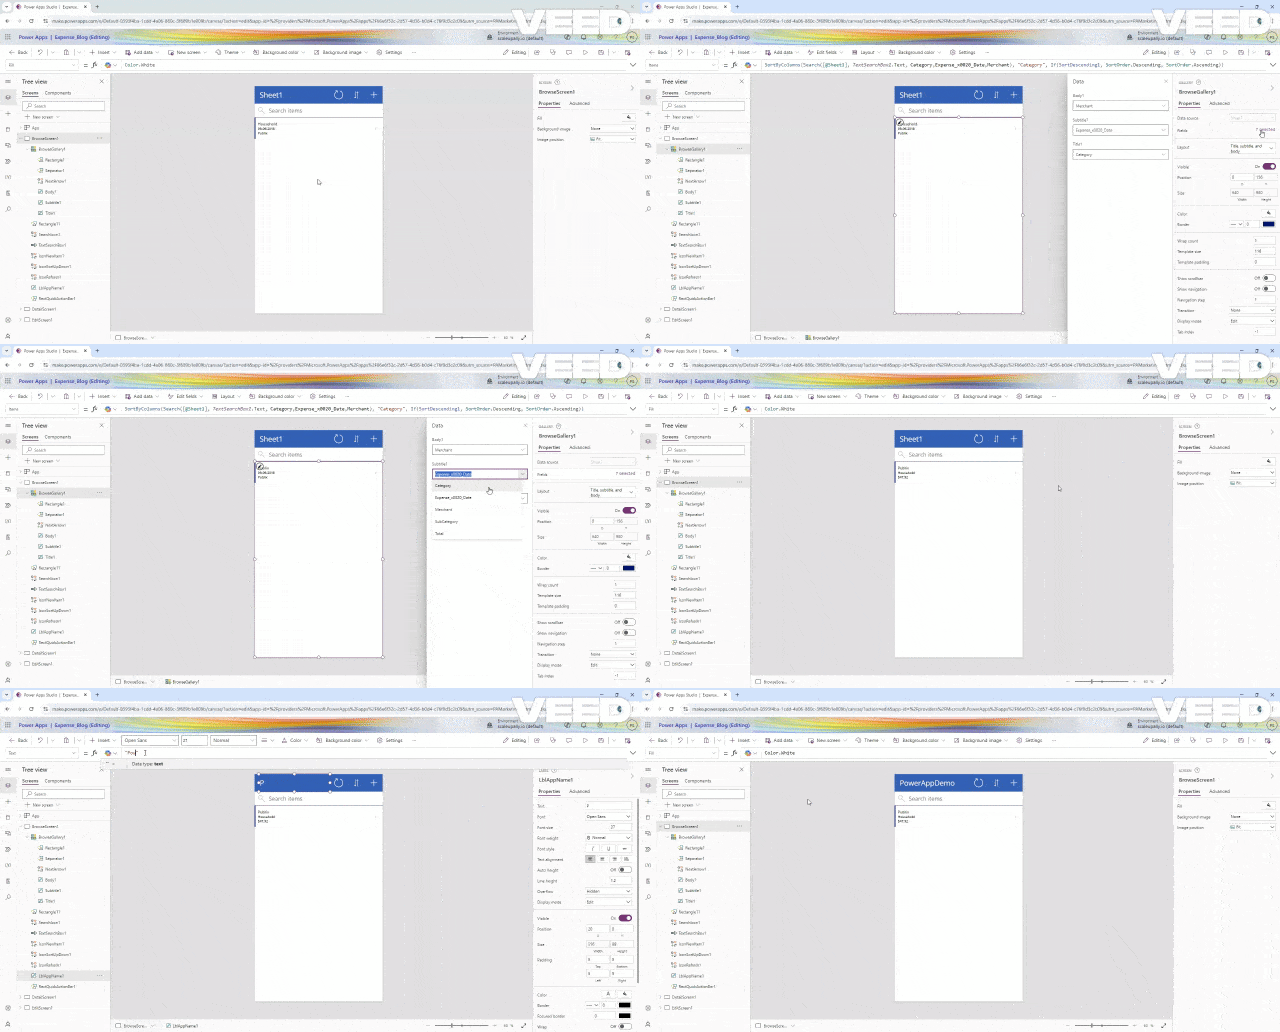
The app has three screens—a display screen, a details screen, and an edit screen. On the display screen, it shows category, expense date and merchant, but it doesn’t show the columns we need. I’ll show you how to use the interface to adjust the display screen to show the right columns as well as the title from Sheet1 to PowerAppDemo.

To change how the gallery looks and rename the title, watch the gif below. Basically, we pick the gallery, go to properties, and change the columns. For title, click on the text label, select the text and rename it from Sheet1 to PowerAppDemo.
3. Test your app
Now let’s test the app.
Click on the play icon at the top right to preview the app.
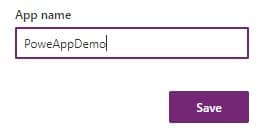
4. Save
Click on the save icon, on the right side and name your app

5. Publish
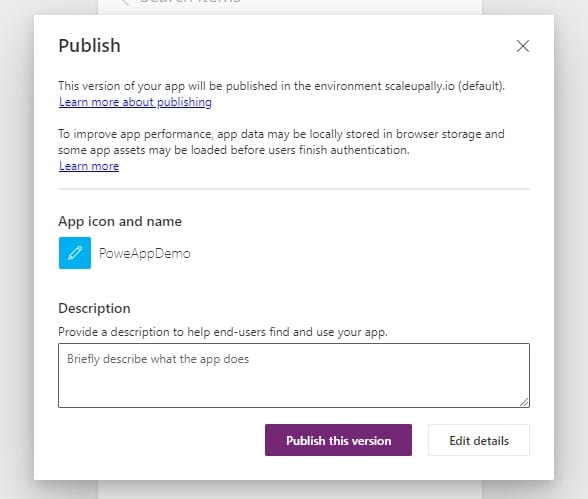
Finally, the last step is to Publish your app:
Click on the publish icon, on the right side and publish this version.

Also Read: How Much Does it Cost to Build a Power App?
10 Types of Apps You Can Build Using Microsoft Power Apps
- Expense Tracker: Monitor your spending.
- Inventory Manager: Track your stock and manage inventory smoothly.
- Sales Dashboard: See your sales info while keeping an eye on performance
- Event Registration: Manage event sign-ups and track attendees easily.
- Visitor Log: Keep track of visitors and manage their info.
- Time Off Requests: Make it easy for workers to ask for and keep track of their off days.
- Training Schedule: Plan and monitor employee training sessions.
- Project Management: Track and organize tasks, project progress, and deadlines.
- Employee Directory: Keep contact information for all employees accessible and up-to-date.
- Customer Feedback: Collect and review customer feedback.
Build High-quality Quality Power Apps With ScaleupAlly
For over seven years, ScaleupAlly has been the trusted partner for startups and established businesses, delivering over 25 top-tier Power Apps. Our expertise in automating and streamlining operations has helped global businesses achieve unprecedented efficiency and growth.
When you choose ScaleupAlly, you’re opting for powerful, custom-built apps that transform your business and drive true innovation. To discuss your goals and how we can help you achieve them contact us today.
Conclusion
In this blog, we’ve shown you in detail how to build a Power App. You can now begin to build something amazing for your business.
So, jump in, and turn your ideas into reality. The possibilities are endless and with Power Apps, you have a free hand in making custom solutions.
But we understand that as a first-timer, our guide on how to create a power app can be a lot to take in. If you need some help building a power App while you focus on other areas of your business, you can reach out to us, and get started.
Frequently Asked Questions
Q: What language does PowerApps use?
PowerApps uses a language called Power Fx, similar to Excel formulas. Making it easy to learn and use for app development
Q: What can you create with PowerApps?
You can build a variety of apps, such as inventory management systems, employee directories, expense trackers, and more, with Power Apps.
Q: Is Microsoft Power Apps free?
Microsoft Power Apps has a free version with basic features, but for more advanced capabilities, you’ll need to pay a subscription.
Related Blogs

Laravel + Elasticsearch: Smart Search for E-commerce in 2025
Learn how to integrate Elasticsearch with Laravel, from setup and configuration to indexing. Improve your app's search performance using Laravel Elasticsearch.
ScaleupAlly Team
Jul 3 ,
15 min read
Developing an App Like Airbnb in 2025: Costs, Key Considerations & Money-Saving Tips
Discover the cost to build an app like Airbnb, key factors, app types, and smart ways to optimize development expenses for better ROI.
Suprabhat Sen
Jun 29 ,
10 min read

Flutter vs Android Studio: What are the Key Differences?
Flutter vs Android Studio: Wondering which technology to choose to build your next app. Here is a detailed guide that will help you make a decision.
Suprabhat Sen
Jun 28 ,
14 min read

