How to Add Custom Checkout Integration With Razorpay?
Suprabhat Sen | September 29, 2024 , 14 min read
Table Of Content
Are you ready to break into the Indian market? Simplifying your payment process is fundamental, and that’s where Razorpay comes in. Trusted by companies like Zoho and Zomato, Razorpay has quickly become a favorite in the fintech space.
What sets Razorpay apart? They’re on a mission to boost transaction success rates, which have traditionally lagged in India compared to other markets.
Razorpay went from being a fintech startup to becoming a unicorn quickly, making it one of India’s most successful entrepreneurial stories. They achieved this by improving the success rates of online payment transactions, which were much lower in India compared to the 95 percent average in the United States.
With Razorpay’s APIs, businesses can easily customize payment integrations on their websites or mobile apps.
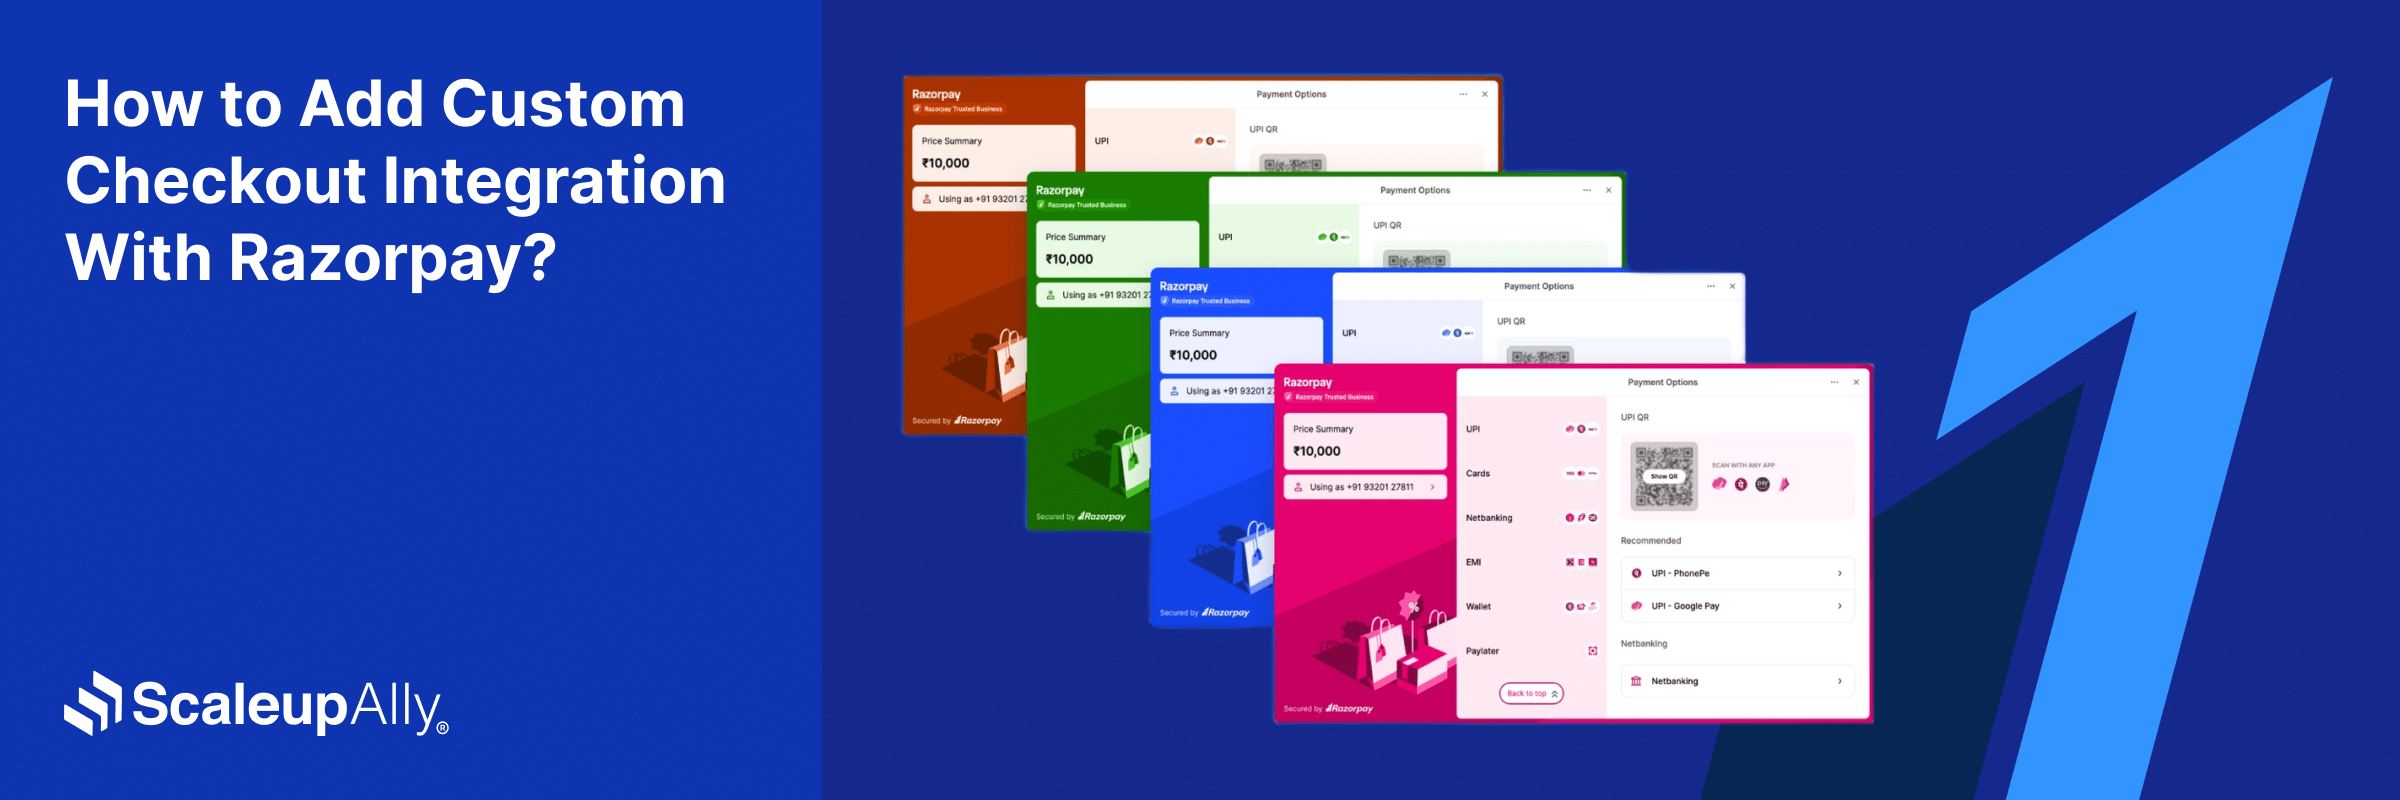
In this article, we’ll take a closer look at how to customize the razorpay checkout page. Let’s dive in!
Key Takeaways
- Boost transaction success rates with Razorpay’s customizable APIs for websites and apps.
- Ensure smooth integration with prerequisites like an API key, secure hosting, and basic web development knowledge.
- Dynamic pricing, multi-currency support, and custom styling enhance the checkout experience.
- Implement webhooks for real-time payment updates and analytics for optimizing user experience.
- Adhere to PCI compliance and strong encryption for secure payment handling.
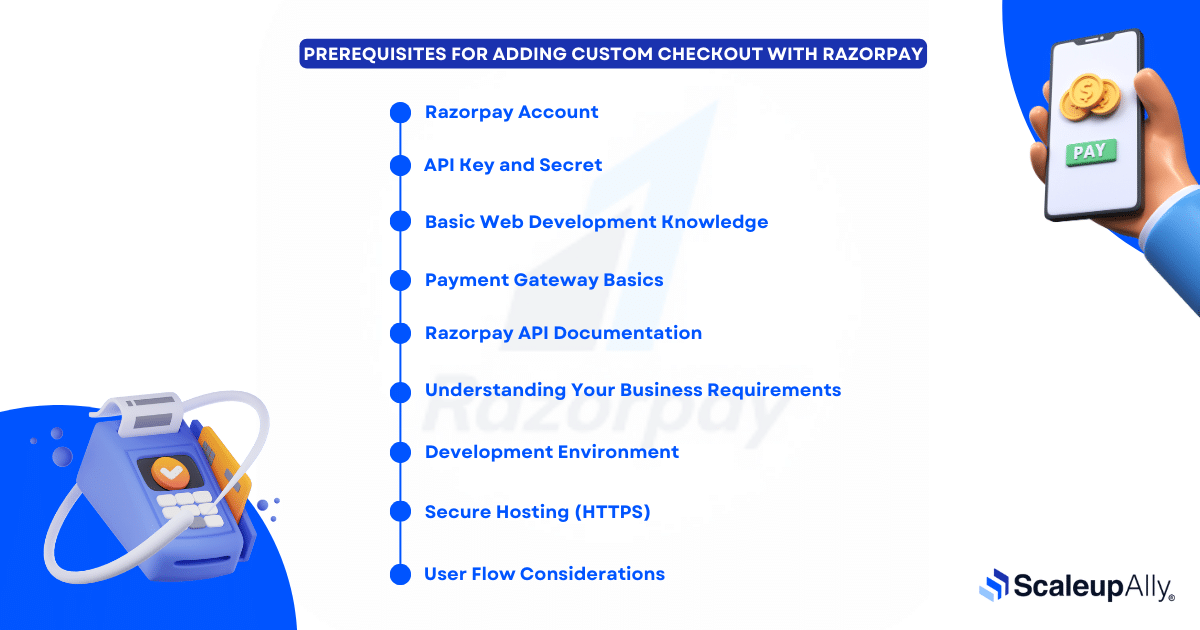
Prerequisites for Adding Custom Checkout with Razorpay
- Prerequisites for Adding Custom Checkout with Razorpay
- Complete Custom Checkout Integration Guide with Razorpay
- Customization Options for Razorpay Checkout Integration
- 8 Best Practices for Implementing a Secure Razorpay Custom Checkout
- Troubleshooting Tips for Razorpay Custom Checkout Integration
- 3 Examples of Razorpay Custom Checkout
- Conclusion
- Frequently Asked Questions
If you’re thinking about improving your online payment system by connecting a personalized checkout with Razorpay, you’re headed in the right direction to offer a unique and smooth user experience.
Before you start integrating, let’s list the things you need to have ready to make sure everything goes well and the implementation is successful.

1. Razorpay Account
- Create an account on the Razorpay dashboard.
- Your account will serve as the central hub for managing transactions and accessing APIs.
2. API Key and Secret
- Obtain your API key and secret from the Razorpay dashboard.
- These credentials are crucial for authenticating requests and ensuring secure communication.
3. Basic Web Development Knowledge
- Familiarize yourself with HTML, CSS, and JavaScript.
- This foundational knowledge is essential for implementing and customizing the Razorpay checkout on your website.
4. Payment Gateway Basics
- Acquaint yourself with fundamental payment gateway concepts.
- Understanding how payment gateways operate will facilitate a smoother integration process.
5. Razorpay API Documentation
- Review the Razorpay API documentation.
- The documentation provides detailed insights into Razorpay’s API functionalities and best practices.
6. Understanding Your Business Requirements
- Identify specific customization needs for your checkout process.
- Tailoring the checkout experience requires a clear understanding of your business goals, branding, and user expectations.
7. Development Environment
- Set up a development environment for testing.
- Testing your custom integration in a controlled environment ensures that it functions as expected before going live.
8. Secure Hosting (HTTPS)
- Ensure your website or app is hosted securely using HTTPS.
- Razorpay requires a secure connection to protect sensitive payment information.
9. User Flow Considerations
- Plan the user flow for your custom checkout.
- A well-designed user flow aligns the payment process with your website or app’s overall user experience.
Addressing these prerequisites will lay a solid foundation for your Razorpay custom checkout integration. With these prerequisites in place, let’s proceed to the integration steps.
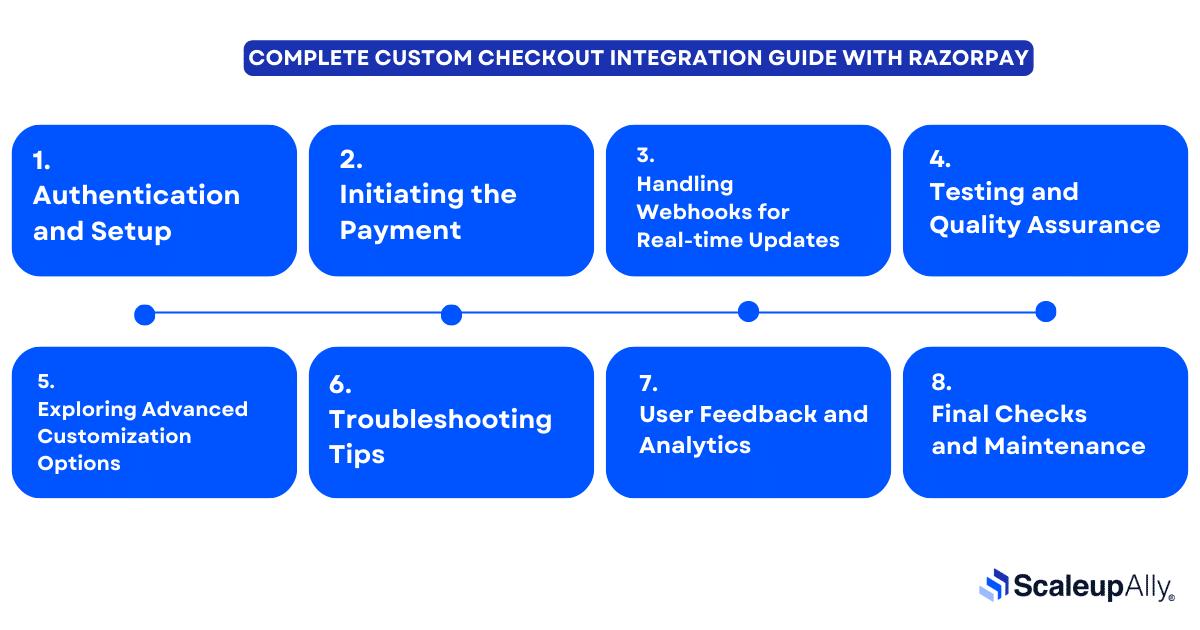
Complete Custom Checkout Integration Guide with Razorpay
Integrating Razorpay’s custom checkout can greatly improve your online payment process, offering a personalized and smooth experience for your customers.
Let’s walk you through the step-by-step process of integrating Razorpay’s custom checkout, ensuring a smooth and successful implementation.

1. Authentication and Setup
- Log in to your Razorpay account.
- Obtain your API key and secret.
- Configure settings according to your business requirements.
2. Initiating the Payment
- Use Razorpay’s ‘Order’ API to create orders.
- Generate parameters for the checkout page.
3. Handling Webhooks for Real-time Updates
- Implement webhooks to receive real-time updates on payment status.
- Enhance transparency throughout the payment process.
4. Testing and Quality Assurance
- Conduct thorough testing in the sandbox environment.
- Simulate various scenarios to ensure a smooth and error-free payment flow.
5. Exploring Advanced Customization Options
- Implement dynamic pricing and discounts.
- Enable multi-currency support.
- Optimize for mobile devices.
- Address security concerns.
6. Troubleshooting Tips
- Develop a robust error-handling mechanism.
- Test in the production environment to mimic real-world conditions.
- Stay informed about updates in Razorpay’s API.
7. User Feedback and Analytics
- Establish a feedback loop for continuous improvement.
- Leverage analytics to gather insights into user behavior.
- Implement ongoing optimization based on feedback and analytics.
8. Final Checks and Maintenance
- Conduct regular security audits.
- Ensure compatibility with browser updates and third-party dependencies.
- Periodically review Razorpay’s API documentation for updates.
Congratulations! You’ve successfully integrated a custom checkout with Razorpay, providing users with a seamless and personalized payment experience.
By adhering to best practices, you’ll ensure the success and longevity of your custom integration.
If you have any questions or need further assistance, our support at ScaleupAlly is ready to assist you. Best of luck in your online payment endeavors!
Customization Options for Razorpay Checkout Integration
When you integrate Razorpay’s custom checkout, its strength isn’t just in what it can do but in how it lets you customize the payment process to fit your specific requirements. Let’s explore the various customization options available to make the checkout process seamlessly align with your brand and user expectations.
1. Custom Styling
- What: Customize the look and feel of the checkout page to match your brand.
- How: Razorpay allows you to inject custom styles using CSS, ensuring a cohesive user experience that reflects your brand aesthetics.
2. Dynamic Pricing
- What: Adjust prices dynamically during the checkout process.
- How: Utilize Razorpay’s API to calculate and display amounts dynamically. This is ideal for applying discounts, promotional offers, or variable pricing based on user inputs.
3. Multi-Currency Support
- What: Enable users to make transactions in their preferred currency.
- How: Implement Razorpay’s multi-currency support, allowing your customers to pay in the currency most convenient for them.
4. Mobile Optimization
- What: Ensure a seamless checkout experience across various screen sizes and devices.
- How: Razorpay provides responsive solutions, optimizing the custom checkout for mobile devices. Test thoroughly to guarantee a consistent experience.
5. Addressing Security Concerns
- What: Implement robust security measures to protect user data.
- How: Adhere to industry-standard practices such as PCI DSS compliance. Stay informed about security updates and continuously monitor for potential vulnerabilities.
6. Webhooks for Real-time Updates
- What: Receive real-time updates on payment status.
- How: Implement webhooks to stay informed about successful transactions, payment failures, or other status changes, enhancing transparency for both you and the user.
7. User Feedback Loop
- What: Encourage users to provide feedback on their payment experience.
- How: Establish a feedback loop to capture user insights. Analyze feedback to identify areas for improvement and implement changes accordingly.
8. Analytics for Informed Decision-Making
- What: Gather insights into user behavior during the checkout process.
- How: Utilize analytics tools to track metrics such as conversion rates, abandonment rates, and average transaction values. Make data-driven decisions to optimize the user experience.
9. Ongoing Optimization
- What: Continuously refine and enhance the custom checkout experience.
- How: Stay proactive in implementing updates based on user feedback, analytics, and changes in the digital landscape. Regularly review and optimize your integration for sustained success.
By exploring and implementing these customization options, you can not only meet but exceed user expectations, providing a payment experience that reflects the uniqueness of your brand.
8 Best Practices for Implementing a Secure Razorpay Custom Checkout
Razorpay’s Custom Checkout is a flexible and customizable way to integrate payments into your eCommerce website or app. To achieve a secure and smooth integration, keep these best practices in mind:
1. Use Server-Side API from Razorpay
- Security First: Keep your Razorpay keys as secure as possible by using the server-side API. This helps prevent unauthorized access.
- Customization: Utilize this adaptability to give you a checkout experience that nearly represents your brand exactly.
2. Enforce Strict Server-Side Validation
- Anti-Frauds: Validate your customer inputs to prevent fraudulent transactions from occurring.
- Data Integrity: Check and confirm that the data you are processing is accurate and as consistent as possible before processing the payments.
3. Handle Payment Failures Gracefully
- Clear Communication: Provide error messages on your web application every time a payment fails, guiding your users on what could have caused the payment failure.
- Retry Options: You want to make it simple for the customers to retry the payment or select an alternative method. It makes the experience frictionless.
4. Protect Sensitive Data
- Compliant with PCI: Make sure that you follow PCI Data Security Standards to protect the card information of your customers.
- Encryption: Use strong encryption methods to secure data while it is being transmitted.
5. Enable Webhooks
- Real-time Updates: Use webhooks to get immediate notifications regarding changes in payment status.
- Automation: You can automate activities to follow up based on the result of a payment, for example, fulfilling an order or delivering a refund.
6. Test Vigorously
- Scenario Testing: Test across various scenarios, including failed and successful payments.
- Think ahead: Be conscious of edge cases and make sure that your system will adapt to them efficiently.
7. Monitor and Optimize
- Track Performance: Keep checking your key metrics, successful payments rate and processing time.
- Identify Bottlenecks and Vulnerabilities: Proactively address any performance bottlenecks or security vulnerabilities that may pop up.
8. Stay Updated
- Razorpay News: Check for updates on Razorpay’s features and best practices constantly.
- Apply Security Patches: Don’t forget to promptly implement any security patches or updates to keep your integration safe.
By adhering to these best practices, you can create a secure and methodical integration of Razorpay’s custom checkout, delivering a smooth payment experience for your customers.
Troubleshooting Tips for Razorpay Custom Checkout Integration
While integrating Razorpay’s custom checkout can greatly enhance your payment system, challenges may arise. Effective troubleshooting is key to ensuring a smooth and error-free experience for both you and your users. Here are some tips to address common issues and navigate potential challenges during the integration process:
1. Error Handling Mechanism
- Tip: Develop an error-handling mechanism to gracefully manage unexpected scenarios.
- Why: Understanding and appropriately handling errors will contribute to a more resilient and user-friendly payment process.
2. Testing in Production Environment
- Tip: While testing in a sandbox environment is crucial, conduct tests in the production environment to mimic real-world conditions.
- Why: Testing in the live environment helps identify issues that may not surface in a controlled setting.
3. Stay Informed about Updates
- Tip: Regularly check Razorpay’s API documentation for updates and changes.
- Why: Staying informed ensures that your integration remains compatible with the latest features and security enhancements.
4. User-Friendly Error Messages
- Tip: Provide clear and concise error messages to users in case of payment failures.
- Why: Transparent communication helps users understand issues and increases their trust in your payment system.
5. Thorough Testing
- Tip: Before deploying the custom integration, conduct thorough testing to ensure a smooth and error-free payment flow.
- Why: Identifying and fixing issues during the testing phase minimizes disruptions for users once the integration is live.
6. Security Audits
- Tip: Conduct regular security audits to identify and address potential vulnerabilities.
- Why: Ensuring the security of user data is paramount. Regular audits help maintain the integrity of your custom integration.
7. Compatibility Updates
- Tip: Stay informed about updates to browsers, devices, or any third-party dependencies that may impact compatibility.
- Why: Compatibility issues can arise with changes in technology. Stay proactive in addressing them to provide a seamless experience.
8. Documentation Review
- Tip: Periodically review Razorpay’s API documentation for any updates or additional features.
- Why: Staying current with documentation ensures that you are aware of new functionalities that can further enhance your custom checkout.
9. Test Different Scenarios
- Tip: Simulate various scenarios during testing, including successful transactions, failures, and edge cases.
- Why: Testing different scenarios helps uncover potential issues and ensures that your custom integration can handle a variety of situations.
3 Examples of Razorpay Custom Checkout
Razorpay’s custom checkout has been successfully implemented by numerous businesses across various industries. Here are a few examples:
1. Flipkart
- Customization: Flipkart has customized its Razorpay checkout to match its brand identity and offer a fluid user experience.
- Features: The checkout includes options for net banking, UPI, credit/debit cards, and cash on delivery, catering to a diverse customer base.
2. Zomato
- Integration: Zomato has integrated Razorpay’s custom checkout into its mobile app and website for food orders.
- Features: The checkout allows users to pay online using various methods, including digital wallets and UPI.
3. Lenskart
- Customization: Lenskart has crafted Razorpay’s checkout to offer a personalized experience based on customer preferences and purchase history, best suited for their business demands.
- Features: The checkout includes options for EMI, gift cards, and store credit, along with secure payment gateways.
3 Examples of Razorpay Custom Checkout from ScaleupAlly
- Kaabil finance
- RTF Insurance
- Ambulance Pathmaker
These are just a few examples of how businesses have successfully maximized Razorpay’s custom checkout to enhance their payment processes and provide a better customer experience.
Conclusion
Thanks for coming along with us on this journey. If you have any questions or need assistance with integrating Razorpay into your business, don’t hesitate to contact us. We wish you success with your personalized Razorpay integration!
Frequently Asked Questions
Q: Is Razorpay suitable for small businesses, or is it more geared towards larger enterprises?
Razorpay caters to businesses of all sizes, offering scalable solutions. Small businesses can benefit from its user-friendly interface, while larger enterprises can leverage its advanced features for extensive customization.
Q: Can I integrate Razorpay custom checkout with e-commerce platforms like Shopify or WooCommerce?
Yes, Razorpay provides plugins and integrations for popular e-commerce platforms. You can seamlessly integrate custom checkout with platforms like Shopify or WooCommerce using Razorpay’s dedicated plugins.
Q. How does Razorpay handle currency conversion for international transactions?
Razorpay supports multi-currency transactions, allowing you to receive payments in various currencies. The conversion rates are updated regularly, and you can refer to Razorpay’s documentation for detailed information on how currency conversion is handled.
Related Blogs

15 Best Payment Gateways in the UAE in 2025 [Latest Updated]
Discover the top 15 payment gateway options in the UAE, including features, and pricing plans for businesses seeking secure online transactions.
Suprabhat Sen
Nov 25 ,
13 min read

Top 13 Mobile Payment Gateway Solutions [2025]
Discover the top 13 mobile payment gateways, with key features, pros, cons, and integration tips to help you choose the best solution for your app.
Suprabhat Sen
Nov 8 ,
18 min read

10 Best Ecommerce Payment Gateways in UAE
Explore the best ecommerce payment gateways in UAE. Compare providers, costs, compliance, and features to choose the right solution for your business.
Suprabhat Sen
Sep 30 ,
13 min read


